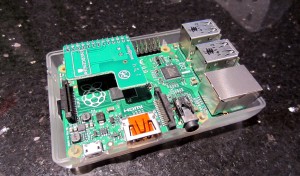
I’ve chosen to replace an ageing mini-PC which I’ve used since 2010 with a new Raspberry Pi 3 B+ running OSMC. It makes for a really capable media centre which can playback newer h.265 HEVC video files at 1080p without any problems, or it can serve 4K files over NFS to a box with a hardware h.265 chip like the Fire TV Box.
This form factor is easy to take on holiday and you can use an old infrared remote control (or Harmony learning remote) with it too.
However, the one thing I’ve struggled with is how to make it easy for my family to use in regard to switching it on and off. The Pi doesn’t have a power button. Some power supplies have an inline rocker switch, which almost fits the bill. I wanted something more automated.
Fortunately I had a spare Energenie power socket from a previous project where I use one to turn off our bass speaker when the TV isn’t on. These power sockets are controlled remotely (over RF) from a Pi which you attach an Energenie control board/shield to.
What I’ve done with the Pi 3 is have it powered through an Energenie socket, and set up a service that executes when it detects OSMC is shutting down. That service will make a quick HTTP call to the Pi with the Energenie controller shield, which will in turn send an RF signal to turn the mains socket off.

Here’s how you can set it up like I have…
Scripts for the Pi running OSMC
First, add a new service script.. create a new file in this folder;
/etc/systemd/system/callenergenie.service
This file contains bidirectional Unicode text that may be interpreted or compiled differently than what appears below. To review, open the file in an editor that reveals hidden Unicode characters.
Learn more about bidirectional Unicode characters
| [Unit] | |
| Description=Energenie Remote Call to Secondary Pi | |
| Before=multi-user.target | |
| After=network.target | |
| Conflicts=shutdown.target | |
| [Service] | |
| ExecStart=/bin/true | |
| ExecStop=/bin/sh /home/osmc/callenergenie.sh | |
| Type=oneshot | |
| RemainAfterExit=yes | |
| [Install] | |
| WantedBy=multi-user.target |
Then enable it with;
sudo systemctl enable callenergenie.service
There are a couple of useful things happening in this service, the After parameter makes sure the code runs before the network code is shut down, and Conflicts parameter is looking for OSMC shutting down.
Now add a helper script… this will make the webserver call as a background task, so control will be given back to the service immediately, rather than it waiting for the wget to complete.
/home/osmc/callenergenie.sh
This file contains bidirectional Unicode text that may be interpreted or compiled differently than what appears below. To review, open the file in an editor that reveals hidden Unicode characters.
Learn more about bidirectional Unicode characters
| echo Calling energenie socket… | |
| wget –quiet –background –output-document="callenergenie.log" "http://192.168.1.99/callenergenie.php?delay=10&switch=2&state=off" | |
| echo Sleeping for 2 seconds | |
| sleep 2 | |
| echo Done. | |
| exit 0 |
This calls the PHP script, telling it which socket to turn off, and how long to delay before sending the command, which we’re doing so that the Pi has time to shut down before the power is cut.
Scripts for the Pi with the Energenie shield
This is the PHP script I added to the other Pi which was already configured to be a PHP web server.
/var/www/html/callenergenie.php
This file contains bidirectional Unicode text that may be interpreted or compiled differently than what appears below. To review, open the file in an editor that reveals hidden Unicode characters.
Learn more about bidirectional Unicode characters
| <?php | |
| /* MattC – Call this with various parameters.. | |
| callenergenie.php? | |
| delay = time in seconds to sleep before calling Energenie | |
| switch = which socket to talk to | |
| state = turn socket on/off | |
| e.g. callenergenie.php?delay=5&switch=2&state=off | |
| */ | |
| print ("Waiting ".$_GET['delay']." seconds"); | |
| sleep($_GET['delay']); | |
| print ("Switching socket ".$_GET['switch']." ".$_GET['state']); | |
| exec("sudo python /var/www/callenergenie.py ".$_GET['state']." ".$_GET['switch']); | |
| ?> |
To allow PHP to run the script as root, I needed to add the Apache user to the list of sudo-ers.. not that secure tho :( I’d be interested in anyone who knows how to run the Energenie scripts a regular user.. their Python doesn’t like it when it’s not root.
nano /etc/sudoers
www-data ALL=(ALL) NOPASSWD:ALL
The nice thing about the PHP script is that we can actually call it to turn the Pi on remotely too.. so you could configure that into a widget on your phone, or add it to Alexa.


You must be logged in to post a comment.